I’ll try to hold back on the details of how we managed to immerse ourselves, on and off, into a 4 x 5 bathroom for five days, except to say that all did not go according to plan. On the other hand, certain things did go according to plan, like everyone finishing the project with the same number of fingers they started out with, so I call it a success. The mismatched angles, bowed walls, and odd preexisting electrical wiring we discovered were good learning experiences for us. “Good learning experiences” is what you say when the project is over. What I said about those things as I discovered them involved many repetitions of words that are often written with asterisks where the vowels go.
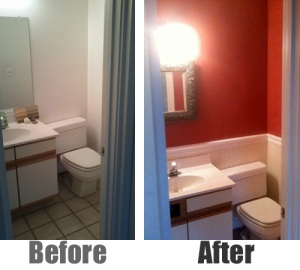
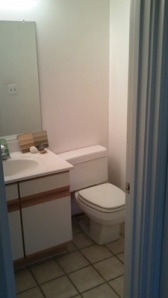
Take a quick look at the transformation. There are still some things that needed fixing when this photo was taken, most notably replacing the fake drawer cover on the vanity (removed due to a failure of things going to plan that isn’t worth delving into now, except to say: Hey people who built our house, WTF?). Overall, we were very happy with the results. It’s an improvement over the original, and although it captures dozens of tiny amateurish mistakes, freezing them in time for us to wince at forevermore, the nice part is it’s a guest bathroom and we don’t have to go in there much.
We learned some important things rehabbing the MLK bathroom, which I’ll list here in the vague hope that someone, someday, will use them to shorten his or her own bathroom remodeling project, so s/he can go snowboarding instead for the last couple days, like I had planned to do.
Get help
The biggest problem facing us at the start of the project was our complete, yawing ignorance. We’d never done a project like this. We’d built shelves and done some other slightly handy stuff around the house, but I had never cut a mitered diagonal to fit molding together at a corner, or wired in a new light fixture, or walked into Home Despot with a tape measure on my belt without feeling like a total poser. We didn’t want someone to do all the work for us; we just wanted a little hand-holding – someone a little more experienced than we were, who could occasionally tell us we weren’t going to screw up the whole thing. My mother and stepfather were our advising team. They’ve done some projects like this, and they had some tools I don’t own that were immensely useful to us. Their help was invaluable in kicking things off and spotting some possible problems we hadn’t noticed. You don’t necessarily need someone to help throughout the whole project, maybe just at the beginning and during some dicey spots.
Cut costs
We were disheartened to find that most of the sheets of wall-board at Home Despot that were dinged or damaged along the edges. On reflection, they were still usable, but would require extra cuts and a bit more planning. We brought this up with a guy in the lumber aisle, and he knocked 50% off the price. From now on, I’m going to look for marred (but usable) goods and see if I can get a discount.
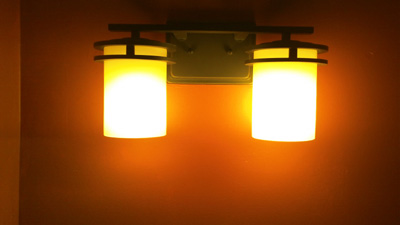
We got an antique mirror off craigslist for $20. We found the light in the “bargain bin” of a lighting warehouse and paid $85 for a $150 fixture. We decided not to replace the faucet unless it looked lousy after the rest of the stuff was done.
Overall, not including the cost of tools (some of which were borrowed), all the supplies for the rehab cost under $300.
Plan
You can save a lot of time and headache by doing things in the correct order. For example, if you learn one thing from this entire entry, it should be this: paint your molding before you install it. We didn’t. Why not? We love the togetherness that comes from packing two people into a half bath, trying to paint quarter-round along the floor and kicking each other in the face.
Here’s the order in which I would suggest doing a project like this. This list is remarkable in that we did almost everything on it in the reverse order.
- Pick out light fixtures and faucets. Remove the existing ones to make sure they’re compatible, aren’t grossly misaligned. We did this almost as an afterthought.
- Pick your colors so you can paint molding before mounting it. We did this second to last. Wrong.
- Paint the walls. Mount lights. We did this last.
- Cut all your wallboard and molding, verify that it fits well, and paint it.
- Mount molding and the like.
- Spackle and touch-up paint.
Surrender
We made mistakes, and found some pre-existing mistakes we were powerless to fix. The wall mount for the light fixture was three inches off the centerline of the vanity, making it difficult to line things up vertically. The bead-and-board pattern of the wainscoting accentuated the complete lack of parallel (or perpendicular) lines in the room, something we didn’t know about until we started cutting and wondering why nothing fit together right.
We joked that we would fix the problems with spackle. The joke quickly morphed into a mantra. The fact is that a rehab project undertaken by a couple novices just isn’t going to turn out right under the best of circumstances. Trust in the powers of 1) spackle, and 2) the fact that most people aren’t observant enough to notice all your dumb screw-ups anyway. Perhaps, given enough time, you might not even see them yourself.


