The Pay Project, Part 1: Economic Value of Firefighters

This project is more theoretical than my usual homemade fare, but is no less DIY. It will test my ability to understand mysterious and complex market forces using my limited knowledge of economics.

I am a professional firefighter. In April of 2007, one of my colleagues was killed in an early-morning fire in a large home. Kyle and his Lieutenant were searching the second floor bedroom, unaware that that occupants had fled to safety at a neighbor’s house. He was 24. We had graduated from fire academy together less than a year earlier.

Shortly after the fire, I was sitting around the living room with my then-girlfriend (now wife), listening to her housemate rail against the numbing inanities of his job. By his own admission, it consisted of little more than moving papers through a red-tape labyrinth. Dreary and  unchallenging, it paid substantially more than what I earned as a firefighter. I had, in fact, taken a pay cut when I entered fire academy. Despite working in an area in which firefighters are relatively well-paid, I was earning about $20,000 less than in my previous gig as a freelance designer and web developer, although I now worked harder, more often, and faced more risks.

In the raw, painful period following Kyle’s death, I was angry about the pay discrepancy. I lived with the possibility of injury or death, and spent considerable time to condition and train myself for the extreme stresses of a job in which a moment’s decision can alter lives; why was I less deserving than someone who spent their day shuffling papers? If we accept that money is the market’s collective means of placing a value on services, then the market was making a clear and unfavorable statement. My choices were making me a less valuable member of society.

I hope you can understand and forgive the bitterness in this question, which was greatly magnified by the events in which it first arose. It began as a simple query – why am I paid what I am, relative to other people (relative, even, to other jobs I’d held)? It was impossible to consider this without taking on more complex questions. Who determines the worth of my job? How do we, as a society, arbitrate the relative merit of each member’s contribution? Is pay an accurate measure of what we do?

And is there a better way?

Some Theories

There are some common-sense rationalizations for pay discrepancies between me and, say, an investment banker. Without delving (yet) into more sophisticated analysis, I generated a first draft of some explanations.

  • Bankers create more wealth in society than firefighters.
  • Firefighting is a physical profession. There’s a larger base of people from which to draw the labor pool, compared with the few people who possess the intelligence necessary for banking.
  • Bankers require more extensive education and time investment to build their careers, and their compensation offsets the personal commitment and sacrifice they undertake.
  • Bankers frequently take on debt to finance their education, requiring a pay structure that makes it possible to pay off loans.
  • There are volunteer firefighters in some parts of the US, and their presence weakens the market for professional firefighters.
  • As public servants, firefighters are paid from the limited money pools of cities and counties, rather than from the larger resources of the corporate market.

These arguments sounded legitimate on their surface, but as I chewed over these ideas, I found flaws in each. I wasn’t certain if the flaws invalidated the theories or were mere caveats. What I needed was some expert analysis. I needed someone who could help me understand the true economic value of a firefighter.

Seeking Expertise

Will Wright is perhaps the greatest game designer ever, and an immensely influential figure in the world of interactive media. My first encounter with one of his visionary projects was when I discovered a game called SimCity around 1990. SimCity was essentially an urban planning and development simulator, and it still blows my mind to think that Will Wright grasped how utterly absorbing it could be at a time when most games still involved running up and down ladders and shooting robots. The player controlled land use, linked areas through roads and mass transit, and established economic priorities to guide the growth of a village into a city, while dealing with crime, gridlock, and natural disasters along the way. I can still remember that areas grew more rapidly when provided with services. Spending some of my precious city budget to build police and fire stations had tangible, positive effects.

Will Wright, I realized, had probably done some investigation into the economic value of public services as he designed SimCity and its successors. He would have some insight into the first question, whether a banker truly creates more wealth than a firefighter.

Will Wright is a pretty busy guy. He’s effectively a celebrity in the world in which he works, an arresting speaker, a game designer whose works are anticipated feverishly for years before their release. It seemed ludicrous to consider that he might have the time to chat about a project he did 20 years ago.

I left a message on his voicemail.

Two weeks passed, and then, one day…

Well, one day I realized he wasn’t going to call me back. I would have to find some local experts to help me understand my place in the economy.

To be continued.

Leave a comment

Filed under Inquiries

Sourdough Sorrow

There’s little to say here but that we suffered a second miserable chapter in our sourdough saga. Having created a new starter, fed it and kept it as warm as our cheap home-heating strategy allowed, then mixed it with the bread ingredients and air kneaded it to an extravagant degree, smashing it with such unabashed enthusiasm and love and, yes, optimism as I held within me, beating it in ferocious anticipation against the counter, so that I’m certain our neighbors must have thought we were engaged in a wrestling match or playing the 1812 Overture through speakers with unusual bass fidelity, and having tucked the dough away for a prolonged rise, not daring to even look for the first couple hours and when, finally looking, seeing no rise, not even then losing hope in the integrity, the stalwartness, perhaps even the pluckiness of our new starter, having fomented it to such exacting proportions and nurtured it to such generous extremes, and instead putting it away again to exert its magic, only to expose at the end of twelve full hours of fermentation not a majestic loaf, something alive, but instead a flabby and inert pool of sour slop, we admitted failure.

Leave a comment

Filed under Failure, Food

The St. Valentine’s Kitchen Rehab – Part 2

Having ignored the advice of the seemingly-knowledgeable man at Home Despot, who told us we couldn’t successfully sand our wood-veneer cabinet fronts, we were fortunate enough to have another expert on hand who was perfectly willing to go along with the plan. Our friend Rose, a professional carpenter visiting for the weekend, examined the test spot we’d sanded on one door and said it was entirely possible.

Ten years after I intended to remove the bulky cabinets that separated the kitchen from the dining area, Rose and I climbed atop the counter and wrestled them down. We’d purchased a new light fixture to install in the space the cabinets had occupied, but after encountering some complications in the existing wiring, we elected to delay that for another session. I have no doubt that Rose could have walked us through a means of cobbling together a solution, but I have this thing about electricity. I’ve seen it start fires that burned down perfectly nice houses, and I didn’t much want to burn down my own by getting creative with the wires. So the replacement lights would have to wait.

When we told Rose we were going to hit the cabinets with a belt sander, she shook her head and told us that a tool that powerful would quickly eat through the veneer and into the particle board below. We would have to use something a bit more controlled.

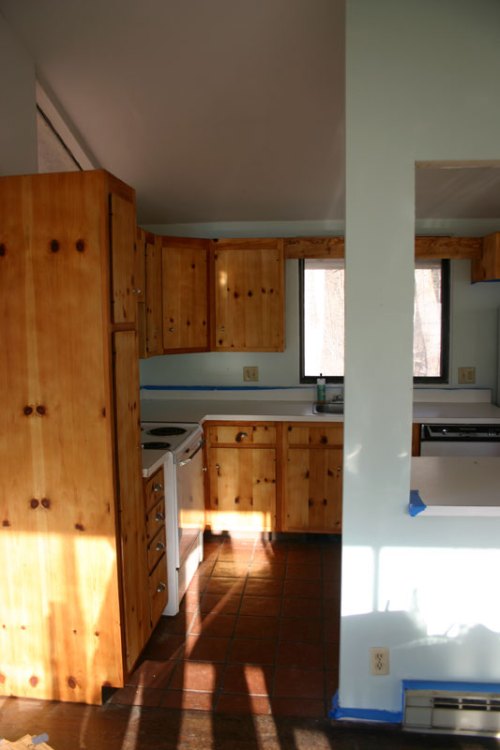
kitchen-before-1

"Before" shot #1

kitchen-before-2

"Before" shot #2 - dark and dreary

We picked up a handheld random orbital sander and some extra sandpaper for the Dremel multi-tool, which would prove itself extremely useful in sanding corners and other tough spots. Rose also suggested the mix of beeswax and orange oil that we rubbed into the stripped panels to offer a little protection and enhance the pinewood grain. The test areas we buffed looked great.

kitchen-dust

So. Much. Dust.

If you haven’t used a random orbital sander (and I hadn’t before this project) and if you are interested in a great upper-body workout that also gives you a nice looking kitchen at the end, then I have great news for you. After holding a random orbital sander at shoulder height for several hours, moving it evenly over a cabinet as the sander randomly tried to torque its weight out of my hands, my shoulders were screaming. The random orbital sander may be the best piece of gym equipment I own.

We worked with the windows open, despite the near-freezing temperatures, due to the astonishing amount of dust generated by the sanding. If you’re ever thinking about doing something like this, I can’t emphasize enough how important it is to create barriers to the dust. It doesn’t just settle in the immediate area; it spreads out like a dirty bomb to coat every surface, horizontal and vertical, within reach of the earth’s atmosphere. Right now, people in the Azores are breathing nanoscopic tidbits of my kitchen. We relocated as much as we could from the kitchen and set up big tents of plastic tablecloths over the furniture in the other side of the common room.

kitchen-drawers

New drawer pulls. Cabinets got simple handles.

It took a couple focused days of sanding, but we were very, very happy with the results. The kitchen went from a dark corner to an airy space that finally felt like part of the common room. We made a couple additional changes that we felt improved the outcome considerably. First, we replaced the existing drawer pulls, which were white porcelain, with inexpensive new ones. Throughout the project, we’d discussed our concern that exposing the light colored pinewood of the cabinets was going to push the resulting decor toward a look we termed “Kountry Kitchen.” While we liked the appearance of the pine, it didn’t work with the old porcelain knobs. The new hardware preserved the rustic look without getting too kitschy.

Second, we took the door off an under-counter cabinet at the end of the island and converted it to a bookcase. We did this as an afterthought, when we realized that we’d given away enough of the old pots and pans that had been stuffed into every cranny of the old kitchen to spare the store room. It made a huge difference and really dressed up the look of the island, while providing a convenient spot for cookbooks.

kitchen-after-1

"After" including the re-purposed bookshelf. Painters tape still covers the edges as we debate colors. Pendant lights will go in the window over the island.

We haven’t yet totaled the receipts from our daily trips to Home Despot, but we estimate that the project costs (sander, paint, wax, hardware, lighting, and other incidentals) will add up to a few hundred dollars.

kitchen-after-2

So much lighter - compare to the "before" shot from the same angle above.

The key factor that made the project work? Having a friend there who was experienced enough to give us good advice. I’m sure we would have muddled through somehow, but Rose saved us much time and heartache with her guidance. As much as I like the idea of the brave amateur who casts aside any fear of failure in his/her DIYings, sometimes it really, really helps to have someone there who knows more than you do. Without our friend and expert, we would have 1) belt sanded the crap out of the cabinet fronts, stripping the veneer, then been obliged to 2) paint them. The result would have been fine, but not as good. As for the new lighting, I wouldn’t even have a plan for that yet.

Knowledge and experience are profound gifts when shared between people. Having someone willing to provide guidance on a project can make the difference between trying it out yourself and failing to attempt it (or having to pay someone to do it for you). If you know how to do something, one of the most pro-social things you can do for another person is help them acquire the same understanding and experience. Sometimes, our economic system forces us to hoard knowledge and demand that others pay us for it. I’d like to imagine that by sharing our experience, we empower each other to reach greater self-reliance and stability.

Leave a comment

Filed under Home, Projects

The St. Valentine’s Kitchen Rehab – Part 1

I was living in a small, unassuming house in West Virginia when I met my wife. People tend to refer to the place as “the cabin,” a bit of mischaracterization that lends itself to images of log walls or a unabomber shack. Instead, it’s a mostly open-plan home that looks every bit like it was built in 1976, and hasn’t had any meaningful revision since then.

I learned a valuable lesson about home repair when I bought the house from friends over ten years ago. The kitchen, despite its placement in the corner of a bright common room with large windows, was eerily dark, hemmed in by a set of hanging cabinets that blocked out the sunlight and made the space feel dingy and isolated. The cabinets had doors facing both inside and outside the kitchen, so I immediately removed them to connect the kitchen with the rest of the space and allow some light to enter. My ultimate intention was to take down the row of cabinets completely, replacing the florescent lights above with pendants that would hang over the prep area of the kitchen island.

Then, ten years passed.

Kitchen before shot 1

The kitchen as I begin a long-overdue demolition of the cabinets

Yes, over a decade after I removed the doors, the cabinets were still hanging up, and the same flickering lights were still in place overhead. Lacking confidence in my ability to make a more meaningful repair without screwing something up, I’d grown accustomed to looking at the doorless cabinets and lost all my will to fix them.

From this, I learned that home improvements have a kind of momentum: fixing something leads to other ideas, and builds the confidence to try new things. It’s crucial to maintain at least a little forward progress, or there is an ever-present danger of stagnation. So, when we decided to rehab the kitchen, the cabinets were first on the list.

The kitchen wasn’t in need of a major overhaul; the appliances still work, the counters are intact, and the tile floor looks OK. Bit it was still a dark and unpleasant place to cook, mostly due to the espresso-brown stain that had been applied to the wooden cabinets, probably in 1976. In fact, if there was a decorating theme to the place when I bought it, it would have been “shades of dark brown.” I’d painted over several milk-chocolate colored walls and the one dark-chocolate bathroom (I can’t imagine that even in 1976 this was a fashionable choice for bathroom color), and the cabinets were the last vestige of the old aesthetic.

We wanted a lighter colored wood that would make the kitchen feel more open and airy, but we didn’t want to tear out all the existing cabinetry, because 1) we are cheap, and 2) we wanted to see what we could do ourselves, and 3) we wanted to minimize waste and not throw away objects that still had a useful life.

To evaluate whether to strip or sand the wood, took a door from the cabinets over to Home Despot. A terribly nice older man, who no doubt recognized a pair of naive, blundering home-repair wannabes at fifty paces, politely told us that the cabinets were clad in a thin wood veneer over particle board, and would survive neither stripping nor sanding. It appeared our only option was to paint over it all.

We’d considered this possibility, so with a little resignation we bought a bucket of primer and went home with our customary million different paint samples.

But back home, we began ruminating over what a shame it was to lose the wood grain. As an experiment, we took one cabinet door and hit it with the dremel and a small sanding attachment. To our surprise, we didn’t immediately burn through the veneer. With some effort, the stained outer layer of wood faded to reveal a pretty, simple knotty pine wood beneath it. A light buffing of oil and wax brought out the grain and deepened the color a little. The result was a rustic but attractive surface – not necessarily the right fit for an ultra-modern kitchen, but just the thing for “the cabin.”

All it would take was some free time and a lot of work. We’d intended to take a vacation during the week before Valentine’s Day, maybe someplace we could sit on some warm sand. Instead, we’d settle for a warm sander.

To be continued.

Leave a comment

Filed under Home, Projects

Snowstorm Sourdough, in which I learn air-kneading and humility

Air kneading sourdough bread

I'm just maniacal about air kneading

After watching this video about San Francisco baker Chad Robertson, Lu and I became increasingly fascinated with making our own sourdough bread. What really drew us in was Robertson’s idea that locally-made sourdough starters reflect the places, even the weather conditions, where they grow. Lately, I’ve felt my bread baking was taking on elements of a quest, tweaking and tuning my recipes in search of a loaf that is perfectly satisfying to us, and the idea that our sourdough could reflect the subtleties of our environment was very appealing.

We followed the instructions on Little House on the Plains to create a sourdough starter, which we left to bubble quietly, occupying the center of our attention in the kitchen despite its innocuous place atop the fridge. After five days, we were a little concerned about the starter. It had never turned into a foamy mass, but had acquired the characteristic sour smell and small bubbles through its first four days; on the fifth, it was no longer bubbling, and the scent was more subdued. We wondered if we should have “fed” it more during its formative period, but decided to soldier on.

It was the morning after the “thundersnow” paralyzed DC, and I had spent the previous 24 hours slithering around in an ambulance, feeling years shaved off my life every time my partner narrowly avoided sending us off the road. Lu had been without power the previous night, but with the lights and the oven back in working order, it was a perfect time to bake some bread infused with the local flavor of the storm.

Having had good luck with the starter recipe, I used Little House on the Plains’ sourdough bread recipe to prepare the dough. This was the first time I’d used weight-based measurements to calculate my ingredients, something I’d been meaning to do since I read somewhere that this is how real bakers do it.

Having punched and pounded my worries away on many a loaf of bread, I was a bit flummoxed by the recipe’s instructions to “air knead” the dough. It sounded like the iconic pizza-chef move of throwing the dough into the air, but Lu located this this instructional video and cleared up that misapprehension (it starts off slowly, but skip to around the 1:00 mark). If anything, this method is more satisfyingly violent, more of a release of pent-up aggression, than my usual dough-wrestling style of kneading.

My first attempts:

The chef in the instructional video advised that the dough should be body-slammed 600 times for a good knead; I fell far, far short of the goal. Nonetheless, the dough clearly grew more elastic and cohesive. After a couple air kneading sessions, it passed the “window test,” in which it stretched out to the point where I could see light behind it without the dough breaking.

Then we tucked it away for a long rise. We had also found the idea of a prolonged rise time oddly engaging, hoping it might lead to changes in flavor and texture that can’t be achieved through faster processes.

As in the original recipe, I saw no substantial rise in the first 5 hours, so I put the loaf in a warm oven and let it alone. We keep the house pretty cool in winter, so I wasn’t concerned about the slow activity. I was committed, even excited about a 12-hour rise.

We got up the next morning to find, as my wife put it, “this storm would have tasted like a flat puddle of flour and water at the bottom of a cold bread pan.”

I usually take bread failures pretty hard, but I remained philosophical about this one. The problem was probably the starter, which we may not have nourished well enough. The cold temperatures, worsened during the blackout, may not have helped. Regardless, there is already another starter perched atop the fridge, percolating, drinking in our local atmosphere, in which it will find no negativity, no sour feelings at lost loaves, just dreams of bread to come.

1 Comment

Filed under Failure, Food

Starting a Sourdough Starter – Part 1

None of the many loaves of bread I’ve baked in my lifetime have been sourdough, because I was a coward. I was intimidated by sourdough, buffaloed by its burly mystique, unnerved by the savage adoration that its proponents hold for their dough cultures, convinced I would never have a culture of my own. It’s alive, opined the fortunate few, tenders of living sourdough starters. You have to feed it. Could I be trusted with a life?

While perusing the subset of DIY blogs that didn’t involve novel tasks for arduino chips, I came across this entry about making your own sourdough starter, and I thought, hmm. Could it be that I’ve put sourdough on a pedestal? Could sourdough starter be within my grasp? It’s hard to be intimidated by something with two ingredients, one of which is water. I resolved to break the sourdough barrier and attempt it myself.

If you want sourdough starter where I live, you’re pretty much stuck in a DIY situation, because I couldn’t find anyone selling it. I even put up a sad little pleading note on the bulletin board of the little organic-stuff store, asking for someone to share some of theirs. I’d just stumbled across this idea that each sourdough starter incorporates the local yeasts and will exhibit diverse regional tastes through the baked bread. This could be a load of yeasty cowmuffins, but I’m going to choose to buy into it for the moment.

The process begins

Watching the process begin

With no obvious local sources for a culture, Lu and I resigned ourselves to doing it the old fashioned way: leaving some damp flour out to spoil. After gathering some extra info from an old Angelfire site The Bread Bakers Forum (did you know angelfire was still operating? me neither), we set about making a rye flour starter. Why rye? I’ve recently been doing more baking with rye flour, and I couldn’t imagine that the usual wheat flour would be special enough to merit a visit from the magical sourdough starter genesis fairy. Rye flour was different. It was hard to find.

The recommended 2:1 water to flour ration yielded the desired pancake-batter consistency. I believe we used about 1/4 cup flour and 1/2 cup water. And then… we left it alone. In a jar, on the fridge. Sometimes, I think it’s the easiest recipes that lend themselves to being most embarrassingly screwed up, and I worry the yeast gods will judge us unworthy. Nonetheless, we’ll be checking on the jar over the next few days, hoping for the bubbles that mean life, and the promise of forbidden bread.


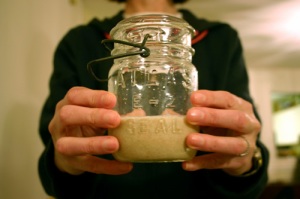
The vessel of our hopes and dreams

The vessel of our hopes and dreams

1 Comment

Filed under Food, Projects

The Martin Luther King Memorial Guest Bathroom Part 2

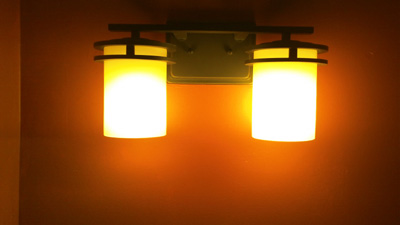
new lamp

The new light, fresh from the bargain bin at the fixture store

I’ll try to hold back on the details of how we managed to immerse ourselves, on and off, into a 4 x 5 bathroom for five days, except to say that all did not go according to plan. On the other hand, certain things did go according to plan, like everyone finishing the project with the same number of fingers they started out with, so I call it a success. The mismatched angles, bowed walls, and odd preexisting electrical wiring we discovered were good learning experiences for us. “Good learning experiences” is what you say when the project is over. What I said about those things as I discovered them involved many repetitions of words that are often written with asterisks where the vowels go.

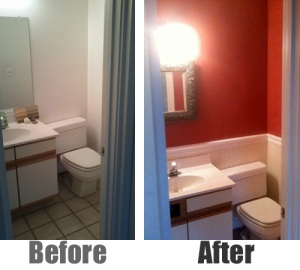
Take a quick look at the transformation. There are still some things that needed fixing when this photo was taken, most notably replacing the fake drawer cover on the vanity (removed due to a failure of things going to plan that isn’t worth delving into now, except to say: Hey people who built our house, WTF?). Overall, we were very happy with the results. It’s an improvement over the original, and although it captures dozens of tiny amateurish mistakes, freezing them in time for us to wince at forevermore, the nice part is it’s a guest bathroom and we don’t have to go in there much.

The bathroom, before and after

We learned some important things rehabbing the MLK bathroom, which I’ll list here in the vague hope that someone, someday, will use them to shorten his or her own bathroom remodeling project, so s/he can go snowboarding instead for the last couple days, like I had planned to do.

Get help

The biggest problem facing us at the start of the project was our complete, yawing ignorance. We’d never done a project like this. We’d built shelves and done some other slightly handy stuff around the house, but I had never cut a mitered diagonal to fit molding together at a corner, or wired in a new light fixture, or walked into Home Despot with a tape measure on my belt without feeling like a total poser. We didn’t want someone to do all the work for us; we just wanted a little hand-holding – someone a little more experienced than we were, who could occasionally tell us we weren’t going to screw up the whole thing. My mother and stepfather were our advising team. They’ve done some projects like this, and they had some tools I don’t own that were immensely useful to us. Their help was invaluable in kicking things off and spotting some possible problems we hadn’t noticed. You don’t necessarily need someone to help throughout the whole project, maybe just at the beginning and during some dicey spots.

Cut costs

We were disheartened to find that most of the sheets of wall-board at Home Despot that were dinged or damaged along the edges. On reflection, they were still usable, but would require extra cuts and a bit more planning. We brought this up with a guy in the lumber aisle, and he knocked 50% off the price. From now on, I’m going to look for marred (but usable) goods and see if I can get a discount.

We got an antique mirror off craigslist for $20. We found the light in the “bargain bin” of a lighting warehouse and paid $85 for a $150 fixture.  We decided not to replace the faucet unless it looked lousy after the rest of the stuff was done.

Overall, not including the cost of tools (some of which were borrowed), all the supplies for the rehab cost under $300.

Plan

You can save a lot of time and headache by doing things in the correct order. For example, if you learn one thing from this entire entry, it should be this: paint your molding before you install it. We didn’t. Why not? We love the togetherness that comes from packing two people into a half bath, trying to paint quarter-round along the floor and kicking each other in the face.

Here’s the order in which I would suggest doing a project like this. This list is remarkable in that we did almost everything on it in the reverse order.

  1. Pick out light fixtures and faucets. Remove the existing ones to make sure they’re compatible, aren’t grossly misaligned. We did this almost as an afterthought.
  2. Pick your colors so you can paint molding before mounting it. We did this second to last. Wrong.
  3. Paint the walls. Mount lights. We did this last.
  4. Cut all your wallboard and molding, verify that it fits well, and paint it.
  5. Mount molding and the like.
  6. Spackle and touch-up paint.

Surrender

We made mistakes, and found some pre-existing mistakes we were powerless to fix. The wall mount for the light fixture was three inches off the centerline of the vanity, making it difficult to line things up vertically. The bead-and-board pattern of the wainscoting accentuated the complete lack of parallel (or perpendicular) lines in the room, something we didn’t know about until we started cutting and wondering why nothing fit together right.

We joked that we would fix the problems with spackle. The joke quickly morphed into a mantra. The fact is that a rehab project undertaken by a couple novices just isn’t going to turn out right under the best of circumstances. Trust in the powers of 1) spackle, and 2) the fact that most people aren’t observant enough to notice all your dumb screw-ups anyway. Perhaps, given enough time, you might not even see them yourself.

3 Comments

Filed under Projects

The Martin Luther King Memorial Guest Bathroom Part 1

My wife Lu deserves all the blame for this project, and by blame I mean the credit, except for the parts that turned out funny. And the name, which is certainly not meant to offend but is probably offensive anyway, was her idea too. It arose from the fact that we spent the Martin Luther King holiday weekend working together in a 5 x 4 bathroom, listening to some of MLK’s speeches during the process.

This was the first time I’d attempted a renovation quite this extensive. It’s painfully difficult for me to start a project when I have absolutely no idea what I’m doing, because I have an amazing – almost superhuman – ability to see in vivid detail the worst possible outcome of any situation. My job might have something to do with this. When you spend your days coming to the aid of people who have set their houses on fire, fallen from unpleasant heights, decelerated much too quickly and into hard objects while behind the wheel of their cars, or suffered an unexpected and terrible betrayal of their own body, you begin to perceive how close we all stand to genuine peril. When I looked at our old bathroom, I could see the possibilities for improvement, but I just as keenly perceived the many ways in which we could screw it up, and in the process damage our house, and possibly our relationship. Matched against this project, I saw only my own lack of experience and the inevitable frustrations that would result.

Lu does not see the worst case scenario when it comes to home improvement. She figures anything is probably better than what we have now, and then starts tearing out things with appropriate gusto. This sounds like a grave mismatch, but in fact makes for a good team. I’ve learned many new skills after embarking haplessly on complex projects at her insistence, or simply coming home from a 24-hour shift to discover that she got bored and started something in my absence. By “started something” I mean “knocked huge holes through the drywall,” to cite one memorable homecoming.

Bathroom before

The bathroom as it was

We decided to start with the guest bathroom because we spend little time there, and wouldn’t have to look at our mistakes very long once the project was complete. Here’s our bathroom before the rehab. It’s fine. There are no holes in the wall, thanks to admirable restraint on the part of my wife. But it has all the charm of cheap construction from an era known as “The Year of Beverly Hills Cop II.”

To keep things simple, we planned to leave the sink, vanity, and toilet in place. The floor was tiled around the base of the base of the vanity, so replacing it would make this a much more complex project, involving my wife knocking holes in the floor, which I wanted to prevent. So our plan was:

  1. Replace the ugly, 1980s-strip-club-dressing-room light fixture
  2. Install “bead and board” paneling around the walls up to about 36 inches
  3. Top this with a molding chair rail
  4. Repaint the whole thing “something that isn’t white”

We figured we could do it all in a couple days, which means three, and when took five I was proud of how close we guessed.

To be continued

1 Comment

Filed under Home, Projects

Bread and the Clock Project

Having enjoyed some success with the bread-making, I veered further off my established recipes and tried something a little different. I’ve been incorporating oat flakes or rye flakes into most of my loaves recently; they lend a richer, more textured feel to the bread. I’d also experimented with using some rye flour. One interesting thing I noted was that much of the flavor I associate with rye bread is actually from caraway seeds that are traditionally sprinkled on the top before baking. Rye flour bread without the caraway seeds tastes more like whole wheat flour, with sightly bitter overtones.

For this batch, I used toasted rye flakes and mixed rye flour together with regular bread flour in about 50/50 proportion. I also used molasses instead of honey; like the rye flour, I’ve been enjoying the more earthy, dense taste that molasses lends the bread. I doubled the amount of molasses to insure the yeast had something to chew on.

The result: so-so. Certainly edible, but not a keeper recipe, which was disappointing because I thought I was closing in on some interesting tastes that would work well together. The bread had a slightly bitter aftertaste, as if the rye flakes had burned slightly during toasting, that may have been accentuated by the flavor of the molasses. I could try the rye combo again and go back to honey as a sweetener, but I’m still enjoying using molasses, so I might make a version with whole wheat flour instead of rye flour, to see if that mellows the flavor.

In other excitement, I received a clock kit I’d been ogling online for quite some time. When you google “clock kit,” most of the results are for woodworking kits in which you construct an enclosure and drop in a prefab quartz timer, perhaps customizing the face and hands. I wanted to build a clock from scratch, assembling the mechanism like a clockmaker. While I grasp the principles and could sort out the math behind the gearing, I wouldn’t have the first idea how to begin building a timepiece more complicated than a sundial. The aptly-named site www.wooden-gear-clocks.com sells just what I was looking for: sheets of pre-stamped gears and all the essential pieces to assemble a clock made almost entirely of wood, along with a very well-illustrated booklet detailing each of the many steps in the process. [I should point out that this isn’t a paid advertisement and I don’t know the guy who runs the site.]

This isn’t a weekend project – I anticipate it’ll take me a few weeks of occasional work sessions. It’s far beyond any similar kit-build anything I’ve worked on before. As a kid, I reluctantly assembled model planes from kits provided by a family friend who felt my boyhood was missing this crucial pastime. The results were not airworthy in appearance. They weren’t even desk-worthy. I believe I may have blown the worst of them up with fireworks provided by another, far less responsible family friend. So the idea of a complex kit that’s supposed to do something and not just sit there looking forlorn, the child of a lesser kit-builder, is daunting. The kit, however, is a thing of beauty unto itself, planks of Baltic Birch wood laser-cut into improbably thin gears bristling with fine teeth. It’s impressive that this two-dimensional package could be reconfigured and fussed into a functioning clock, but I’m still at that early stage in the expertise curve when it seems possible, even easy; the first few pages of the kit booklet will no doubt cure that sentiment.

1 Comment

Filed under Food

Homemade Yogurt

Making yogurt sounded like an easy project, and since I don’t even like yogurt, I wouldn’t have to worry much about the outcome. My wife consumes it at a pretty steady pace, so this could be a money-saving project with some direct benefit for her. Sometimes I think she questions the whole rudimentarian experiment, and I’m eager to demonstrate its value. Recent scene in the grocery store:

Her: Want some bagels?
Me: Yes… but… I’m trying not to buy what I can make.
Her: OK. (She fills a bag with bagels she likes.)
Me: You could buy an extra and I could take one of yours.
Her: No, you make bagels.

There are also moments, like when I’m talking about making a wooden clock mechanism instead of remodeling the bathroom we’ve been planning for a couple months, when I realize she deserves some sort of consolation prize for putting up with all of it. So, the yogurt would be a small peace offering.

It came out ahead on my assessment of DIY viability:
Quality: + Likely to be as good or better than mass-produced
Cost: + Despite the initial cost for a new food thermometer, should save money in the long run
Time: – Somewhat more time-consuming than buying it at the store
Satisfaction: + A little. How hard can it be to assist milk in spoiling?

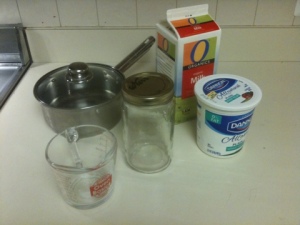
The simple ingredients

The simple ingredients

I used the comprehensive instructions from this page, written by a Ph.D. Professor of Biology and Chemistry. Essentially, you scald the milk up to about 185 degrees, cool to 120 degrees, inoculate with a small amount of yogurt culture (I used store-bought yogurt), and allow the mixture to sit at a consistent temperature for about 4 hours.

The result: failure.

My hours of effort yielded a big batch of sour milk soup. I don’t blame the instructions, which were excellent. I believe the issue was cheapness. My newly-purchased $10 food thermometer gave wildly diverse readings, making it tough to determine when the milk had reached critical temperature points. More importantly, I was sabotaged by my own miserly thermostat settings. We keep the house at a thrifty 60 degrees during the day, and although I packed the milk/yogurt slurry in a cooler wrapped in towels, and put it in the furnace room (note: a deviation from the Professor’s method of warm-water immersion), the ambient chill made it difficult to keep the mixture warm enough for the culture to grow.

I suspect this may be a reason that I associate yogurt with warm-weather cultures. I’m guessing the technological equivalent for cold climates is cheese production.

I was unprepared for how annoyed I felt over this setback. I had assumed that this would be an unfuckupable slam-dunk of a project. Between babysitting the milk as it heated, and checking temperatures again regularly as it cooled, the process had consumed significantly more time than I’d expected, and almost against my will, I became heavily invested in the results. Despite the fact that I wasn’t even going to eat the completed product, I gritted my teeth as I poured the result of a morning’s work down the drain, uttering curses, being a difficult and unpleasant person, and vowing never to try making yogurt again.

Until summer, that is, when our penny-pinching use of the A/C and balmy indoor temperatures should make this an easy win.

2 Comments

Filed under Failure, Food, Projects